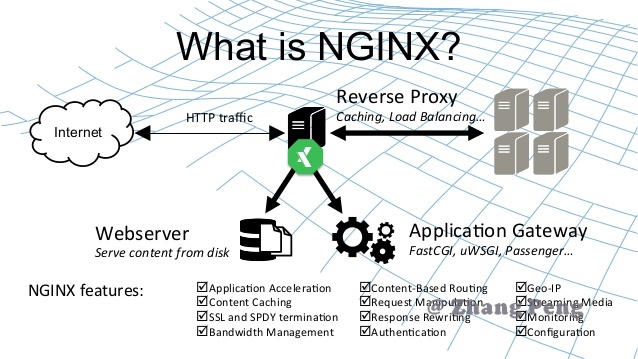
Nginx 可以使用brew安装, 安装好后, 使用 sudo nginx 启动, 打开网页localhost:8080 查看是否安装成功.
路径配置如下:
Docroot: /usr/local/var/www
Config Path: /usr/local/etc/nginx/nginx.conf
Log Path: /usr/local/var/log/nginx
其默认端口为8080.
The default port has been set in /usr/local/etc/nginx/nginx.conf to 8080 so that
nginx can run without sudo.
可以通过 brew services 的方式让其开机自启动:
brew services start formula
Start the service formula immediately and register it to launch at login (or boot).
1
|
brew services start nginx
|
当然如果不需要开机自启, 也可以直接使用命令nginx
nginx -s stop       快速关闭Nginx,可能不保存相关信息,并迅速终止web服务。
nginx -s quit       平稳关闭Nginx,保存相关信息,有安排的结束web服务。
nginx -s reload     因改变了Nginx相关配置,需要重新加载配置而重载。
nginx -s reopen     重新打开日志文件。
nginx -c filename   为 Nginx 指定一个配置文件,来代替缺省的。
nginx -t            不运行,仅仅测试配置文件。nginx 将检查配置文件的语法的正确性,并尝试打开配置文件中所引用到的文件。
nginx -v            显示 nginx 的版本。
nginx -V            显示 nginx 的版本,编译器版本和配置参数。
1
2
3
4
5
6
7
|
   server {
        listen       80;
        server_name  blog.Domain;
        location / {
            root   /Users/htao/Desktop/blog.nosync/public;
        }
    }
|
为了能直接通过emby.DOMAIN 直接访问 emby.DOMAIN:8096, 可以做如下配置。
 1
 2
 3
 4
 5
 6
 7
 8
 9
10
11
12
13
14
15
16
17
18
19
20
21
22
23
24
25
26
27
28
29
30
31
32
33
34
35
36
37
38
39
40
41
|
server {
    listen 80;
    server_name emby.DOMAIN;
  add_header X-Xss-Protection "1; mode=block" always;
  add_header X-Content-Type-Options "nosniff" always;
  add_header Strict-Transport-Security "max-age=2592000; includeSubdomains" always;
  add_header X-Frame-Options "SAMEORIGIN" always;
  proxy_hide_header X-Powered-By;
  add_header 'Referrer-Policy' 'no-referrer';
  add_header Content-Security-Policy "frame-ancestors DOMAIN emby.DOMAIN;";


     location / {
        proxy_pass http://127.0.0.1:8096;

  proxy_set_header Range $http_range;
  proxy_set_header If-Range $http_if_range;
  proxy_set_header X-Real-IP $remote_addr;
        proxy_set_header Host $host;
        proxy_set_header X-Forwarded-For $proxy_add_x_forwarded_for;

        #Next three lines allow websockets
        proxy_http_version 1.1;
        proxy_set_header Upgrade $http_upgrade;
        proxy_set_header Connection "upgrade";
  }
}


 server {
 # qbittorrent
 location /qbt/ {
    proxy_pass              http://127.0.0.1:8080/;
    proxy_http_version      1.1;
    proxy_set_header        X-Forwarded-Host        $http_host;
    http2_push_preload on; # Enable http2 push
}
}
|
